Sunday, 1 March 2015

Elsa frozen birthday cake

Long time since I put a post on here. You know how it is you get busy, you move on to different things or you just run out of juice. I would like to say thank you to all that have visited my blog. I hope you have enjoyed looking at past posts and manage to gain some inspiration or maybe I have inspired you to make a card or try another craft. 
So let's update this blog with a new post.  This blog started off with paper crafted cards and a few other ideas. I like to try new crafts and try new skills.  You have also seen a few birthday cakes I've made for my beautiful granddaughter. So today I want to share with you her latest cake. 
Can't beleive she's 3 already. So what did many little girls want for Christmas 2014. Ellie wanted an Elsa doll, just like many little girls which was a problem because grandma spent 3 weeks looking for the one we wanted. So when her birthday came up what did she want an Elsa cake. So this is what I made her.


I bought a Barbie doll to use as main part of the cake. I chose this one because the way her arms were positioned as I wanted it appear like the scene I. The film when she singing that song that many of us are sick on hearing. Barbies have changed since I was a little girl they had bendy legs and arms some were jointed. Now many of them seam like there extremities are fixed and only the expensive dolls
are jointed at knees and elbows. So choose a doll within your price range but one that also has arms  that fit in with what you want them to do.

The cake like any takes a little planing of what you need to buy and what needs to be done first to allow to dry. I made the bodice to her dress with fondant. Rolled  it out and moulded it to the doll form and cut the neck line to shape I wanted. I made the snowflakes using my paper punch but
because I had to roll fondant so thin they were very delicate so I made lots of the snowflakes.
MY granddaughter calls snowflakes snow bubbles... Cute..
All the back of the dress is cake  
Sorry about quaulity of the photos. Everything has changed since I last posted on here and I've had a lot of problems just posting this. 

If you would like to make a cake like this you can find lots of similar cakes  or tutorials  on pintrest
Thanks for stopping b.
Klare x


Thursday, 14 February 2013

Cakes and mice

Hi.  In my last post I said I had been busy but not doing cards. So what have I been up to.? .... Well it's was my granddaughters 1st birthday. So my daughter asked me to make her a birthday cake.  So I am thinking cute little cup cakes and trust me I felt out of my comfort zone decorating cupcakes. So imagine my panic when my beautiful daughter said she wanted a castle cake.....
 What no cute little cup cakes with piped swirls and a few sprinkles...
I could just about challenge myself with these.
No it has to be a castle cake for Ellie's 1st birthday.
so this is what my little princess got.
this picture was taken before I added a few more details like the path gravel, candles and a few other little things.
In this one you can see the top towers  were lit up I used battery lit tea light candles.
and here view looking down. Like my cards, my cake had lots of edible glitter added. You can just see it added to my granddaughters name.
I am very pleased how the cake turned out. Considering this was the very 1st time I have used fondant, let alone picked up a icing bag.
 
My worry now is this.... if this is  what my daughter wanted for Ellie's 1st birthday.....
what extravagant ideas will my daughter and granddaughter have for grandma to make for coming birthdays.
 
and here are the mice I made as a little extra gift for Ellie.
these little mice were in the molly makes magazine last year and,
I thought i would make them for Ellie.
I had some help with little cutie. My friend Caz at the paperlane / witch wool shop in Northallerton
she kindly knitted the little cardigan shes wearing.  As my knitting skills are very limited.
Caz she has so many beautiful yarns I wish i could knit but i don't have Patience.
She stocks yarns that are very good quality and so soft they are just pure luxury
She made this little cardigan  from alpaca wool,
But she also stocks
Silk & Merino, cashmere blends, 100% Baby Llama and Merinos wools/yarns.
And here is the little boy mouse. his waist coat looks a little large so think 
 I make make him a more fitted one.
I hope you have enjoyed a little look at something a little different from my usual cards
Thank you for visiting my blog.
Please feel free to leave comment or ask questions about the cards I make. All comments are truly appreciated. I dearly love to read all your comments, as they inspire me to create more beautiful cards to share with you.
bYe ByE
for now
Klare
:O)
x

Tuesday, 5 February 2013

Thank you- Magnolia hanging Bunnie

Sorry I've not been posting regular of late but I have been been busy with other things than cards. But just thought I would share this cute little thank you card I made.
Just a simple little card with lots of mat and layering.
The image is a magnolia stamp-hanging Bunnie
The image was coloured with mainly polychomo pencils and blended with Sandor and a blending stump. I also used a few copic markers.
Image as you can see was stitched around the outer edge.
The papers used through out the card are from primas pixie glen 6x6 pad.
As you can see I added a Dollie and some lace off cuts, and a few stick on pearls
Also a seam binding bow with pearl in centre just to finish off this cute little card.
Thank you for visiting my blog.
 
Please feel free to leave comment or ask questions about the cards I make. All comments are truly appreciated. I dearly love to read all your comments, as they inspire me to create more beautiful cards to share with you.
bYe ByE
for now
Klare
:O)
x
 

Sunday, 20 January 2013

Valentines penny black stamp card

Welcome to my blog I have another card to share with you today. So are we enjoying the snow? or are you wishing for it to go yet? Me i love to she it and how clean and bright it looks and how beautiful nature looks with a sprinkling of sparkling crystal blanket of snow.
So its coming to that time next event in the celebration calender....
Valentines day.
  
So for this card I pulled out some of my older stamps from Penny Black.
theses were some of the first stamps I bought that got me interested in rubber stamping.
 
So here is close up of the  stamped image. It was a smaller image than I am used to working with.
This cute little cat holding a rose was just so sweet for a valentines card he was coloured with copic markers. Then i used so bright apple red glitter for the heart and the rose.
 
So as the image was so small. worked on embellishing it to make it fill out the card.
I used a memory box heart die and added a joy craft flourish die at the point of the heart.
Then layered that with ribbons and lace.
 
Inside card was finished off to compliment the outside.
Thank you for visiting my blog.
Please feel free to leave comment or ask questions about the cards I make. All comments are truly appreciated.
bYe ByE
for now
Klare
:O)
x

Tuesday, 8 January 2013

Wee stamps card

Happy new year to you all. Hope this year will bring you plenty of happy times and many cherished memories for the future.
I know I not been around as much  sorry to those of you who cheek out my blog on a regular basis. Well I'm am glad Christmas festivities are over and its the start of a New year. New beginnings, plans and ideas hopefully.
Have been stuck in Christmas mode with my cards and glad its over so I can try and get my mo-Jo back and create something other than that.
 
 
 Today's card I have used
Fairy belle papers from prima ( I added glamour dust glitter with quickly glue pen)
Copic markers and polychromo pencils (image)
Perfect pearls (image on wings)
Selection of wild orchid flowers
Wee stamps (these came free on paper craft essentials magazine)
Joy crafts cutting die
ribbon lace and stick on pearls and crystals.
Picture quality is not good on next picture
As I took picture with lamp on  to show all the glitter.
(need a day light lamp then could show picture in better light)
Fingers crossed for next Christmas eh ..lol
With the quickly glue pen you can outline where you want the glitter
and the nib so fine you get a nice fine line.
Then just sprinkle your glitter on top glue ink, tap off the excess glitter, and you have lovely glitter embellished papers.
To added the perfect pearls i just used the glue pen again and took a dry paint brush with some pearl powder and applied to glue area on wings. brushed off the fall out . cant see in this picture but the wings have a lovely pink iridescence to them.
 
Here is the inside of the card didn't have to do much to this, just outlined the parts i wanted to have glitter with glue pen and added the sparkle.
The papers from this pad are so pretty.
Thank you for visiting my blog.
Please feel free to leave comment or ask questions about the cards I make. All comments are truly appreciated.
bYe ByE
for now
Klare
:O)
x

Thursday, 6 December 2012

Christmas Dawn -Nellie Snellen card

Well we have snow my garden looks as lovely as everyone Else's with a snow blanket twinkling bright. Sky's look like they will be more before the days out.
Had nasty tummy bug so not got much done in the way of crafting, Have managed to get the set of Christmas cards finished I was making for some one.
so here's one that's part of the set. I used a Nellie Snellen Stamp
and plenty of die cuts as you can see.
Used copic markers on this card and lots of glitter.
for all the bases of the card used the bought cards as in prior post.
Then added my bits to it.
 
And here is all the finished cards ready to be given.
That's all for today going to go now and snuggle up and keep warm.
Thank you for visiting my blog.
Please feel free to leave comment or ask questions about the cards I make. All comments are truly appreciated.
bYe ByE
for now
Klare
:O)
x

Wednesday, 21 November 2012

Hokey Pokey Christmas card

Hi, its a horrible wet day here today, Bet my horse its pleased hes not paddling in mud in the Field. Left him tucked up in a nice clean stable with his pj's on and turnip on a string to keep him happy.
Yep back to the Christmas cards with today's post. But if you want  to send them, you have to make them or buy them to send. Well this cards a bit of both.
I seen this card in supermarket while I was doing weekly food shop with my hubby.
A pack of 10 cards for £1.00. My hubby looked at me puzzled "why you buying Christmas cards when you make cards?". Well its simples I wanted the cards to used the front image as my background on another card and it was cheaper than me buying these cards than background papers.
I have been asked for a set of 10 handmade cards so this was perfect, As the would all have the same background image and it was more cost effective for me  to use the bought cards but add my bits to it. Also another good reason to purchase  the cards is that it states on the back of the card that
"By purchasing this card you are helping us to raise up to £100,00 for Save the children, The money raised will go to helping the most disadvantaged children in the UK for  better chances in life."
These cards were bought from Morrisons supermarket.
And all I had to do to the pre bought cards was add my touches.
So all I have done is used my memory box dies and added my stacked snowflakes.
added a bow and a little more sparkling glitter and of course the stamped image.
The stamp here is a Nellie Snellen Dawn stamp called Hokey Pokey
She was coloured with copic markers, and a little glitter added. Also used a pearl pen to add pearl snowy dots.
Here is the inside of the bought card. Which was perfect not much to do here as it was all ready for sentiments and loving wishes to be added by sender. the only thing I did to it was add a little glitter to the snow flacks in top corner.
Right its time I was going back in my craft room to get myself covered in glitter again.
 
Thank you for visiting my blog.
Please feel free to leave comment or ask questions about the cards I make. All comments are truly appreciated.
bYe ByE
for now
Klare
:O)
x


Wednesday, 7 November 2012

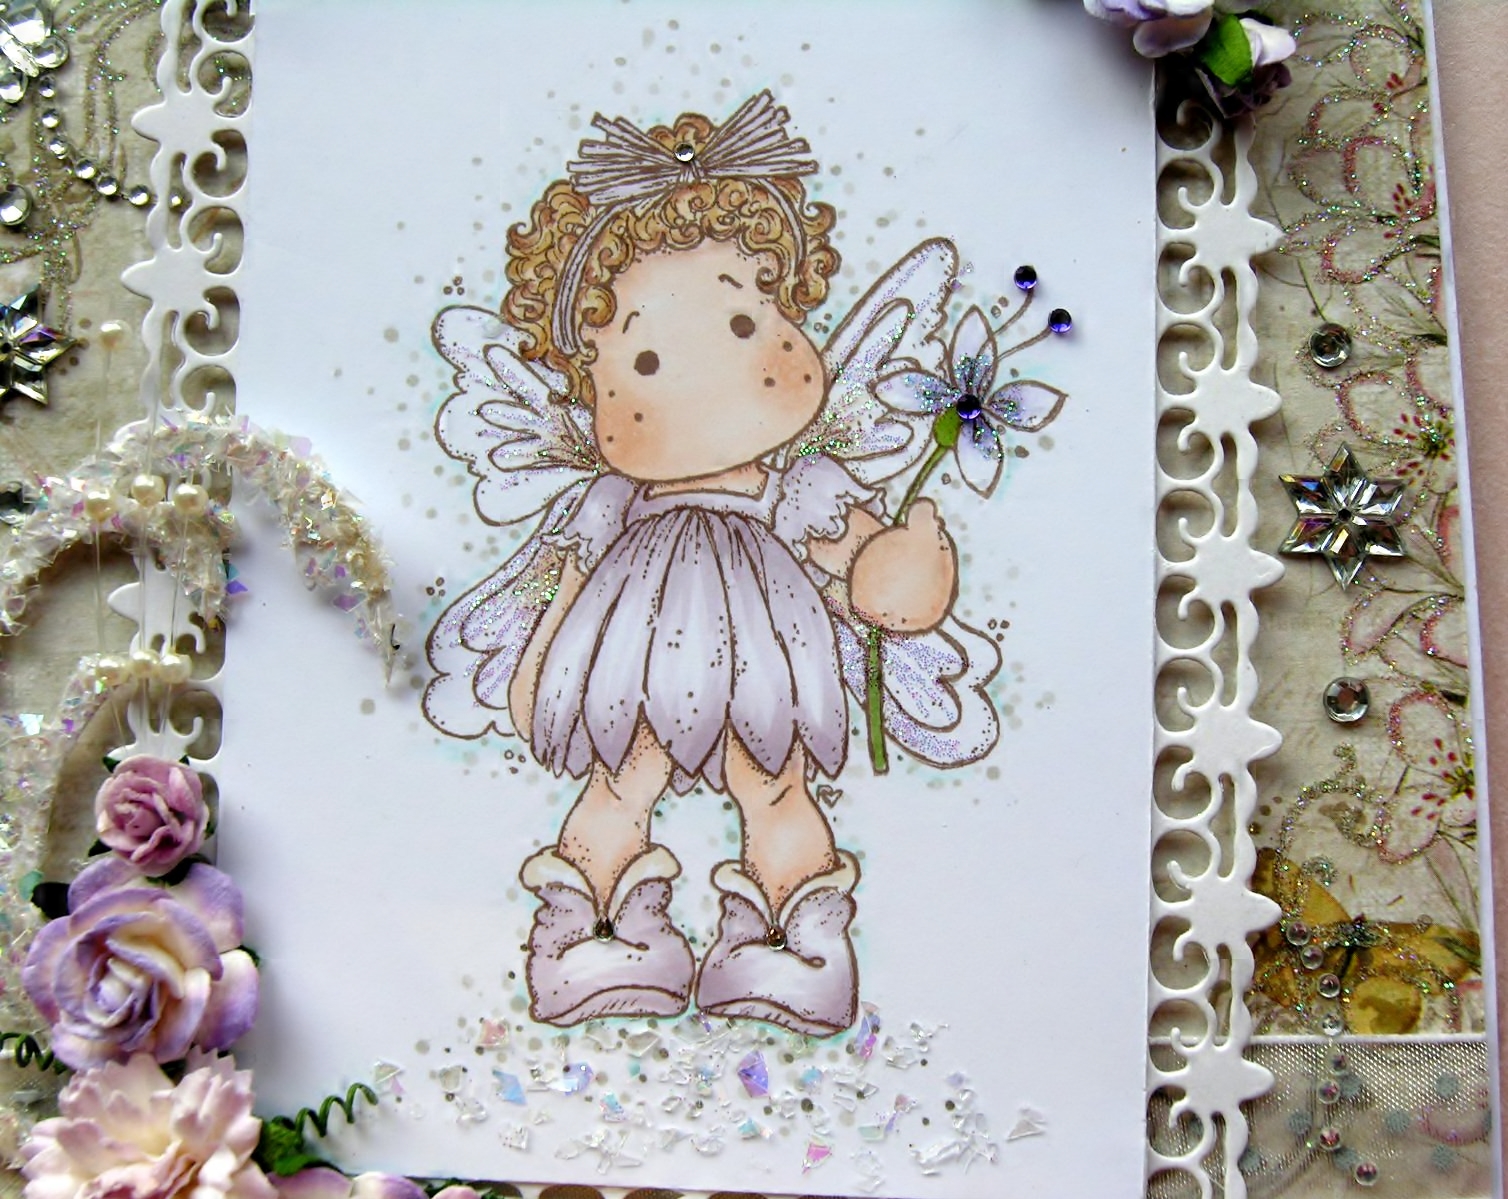
Summer flower tilda-Magnolia stamp

Surprise ...... no Christmas card today and snowflakes.
Thought I should do something other than Christmas as I needed to as I am feeling a little overdosed on Christmas. Its only November and Christmas stuff has only been in the shops since October. It starts earlier and earlier each year, But in one way its good as it helps you start your shopping and spreed it out a little.
So I inked up Summer Flower Tilda and coloured her with delicate mauve shades.
 
I've coloured her with my usual combination of copic markers with a touch of polychomo
pencils
Skin : E000,Light Flesh 132, Medium Flesh131, Cinnamon 189
Hair: E50,E31,E35
Dress, Shoes and Wings :V91, E41.
Flower : BVOO, YG63.
I added dots for shading and interest. used W1,W3,W5.
Also added light cobalt turquoise 154 to outline little areas of image.
I have used a glue pen to outline flowers on papers (prima fairy bell) then sprinkled with glamour dust. At her feet I used Cosmic shimmer Glitter jewels glitter flakes.
Used Wild Orchid Flowers is a a similar shade to match with image.
Added a  Tim Holtz elegant flourish sprinkled with the glitter flakes.
Needed to cut flourish up and add it to assent the flowers.
Inside of card just same paper with added glitter and small corner of ribbon.
Few other little touches were using a border die to edge image, Ribbon, and few stick on crystals for flower centre, also on edges just to fill a space and add sparkle.
 
 Thank you for visiting my blog.
Please feel free to leave comment or ask questions about the cards I make. All comments are truly appreciated.
bYe ByE
for now
Klare
:O)
x


Wednesday, 31 October 2012

Christmas bears present - Lili of the valley

Just a quick post today, Was asked to make a card using the Christmas bears present stamp by lili of the valley. using the same colours and similar style to another card I made using the same stamp.
So this is what I did.
 
As you can tell I am loving the stacked snow flakes effect .
They seam to be on all my Christmas cards of late.
But the card was requested to have the snowflakes round the image.
 
I coloured this cute little bear using copic markers and Polychromos Artists Pencils
Bear : copics E31, E33, Black pencil
Hats & Scarf : R46 Black pencil also E41
Dress :BG72, Black pencil
Present: E41, BG72, Black pencil
Mouse :E40, E43, R000
Stars: Pencils dark naples ochre 184, cream 102
Holly:YG 63,G94,R46

I also added glamour dust to hat, pom-poms
The dies used are memory box Frostville
and Cherry lynn snowflake dies.
For the banner this is hand made no dies for this one.
This is how you make these. I found this on Pintrest.
which was very helpful and i think mine turned out OK.
Pinned Image
Would have liked to used a banner die but don't have one.
so that's it for today.
 
Thank you for visiting my blog.
Please feel free to leave comment or ask questions about the cards I make. All comments are truly appreciated.

bYe ByE
for now
Klare
:O)
x


Monday, 22 October 2012

Trimming the tree -Saturated canary

Hello this cards been sitting on my desk for a week just to put together and I finally got round to it. With Christmas just round the corner its another Christmas card. I am sure many of you will be already buying your gifts and writing your lists. I myself have got my grand daughters gifts sorted early with my husband been made redundant in Nov. (fingers X he finds a new job before November )
 Any lets get back to the card
Not your usual Christmas colours as you can see
I coloured her with a mixture of copic markers and Faber Castell polchromo pencils
Skin E000 Light flesh132,Cinnamon189 a touch of  R11, for her lips
Hair E50,TY31, E31
Dress BG10, Cobalt green 156, E41
Shoes W1,W3
Rocking horse R11, B000
Baubles R000,B000,G00
Box E35
Fabric drape and Tree YG03,G82
 
The main image is a saturated canary stamp but I added the rocking horse and baubles from a old stamp set I've had many years - Country craft  Trim* a* home

I used layered die cut snowflakes and magnolia vine die cuts to embellish the corners and the usual suspect ribbon. The papers used are from cella door to which I added green glitter too. There's also a sprinkling of glitter to the tree branches.
 
Thank you for visiting my blog.
Please feel free to leave comment or ask questions about the cards I make. All comments are truly appreciated.
bYe ByE
for now
Klare
:O)
x


Tuesday, 9 October 2012

Oh Christmas Tree - Lili of the valley card

Well there certainly a chill in the air my heatings on full time now, and the jumpers that never went away all year are now joined by scarfs and next will be mittens. brrrr, and I'm still cold sat by this window in my little cubbie hole under the stairs like a little mouse.
From the title yep you have guessed it
...its a Christmas card for this post. This cute little stamp is from Lili of the valley
and its called  Oh Christmas Tree.
I coloured this cute little scene with Copic markers, and polychromos artist pencils
I did have a list of the colours used but... I have misplaced it sorry.
Here are the cute little roses I made from the same card I used to matt, and layer
I added some glitter to edges once I glued them in place. For the fern type foliage I used the marther stewart branch punch.
And here is how i finished off the inside of the card. This again is a lili of the valley stamp.
The snow flakes are a mixture of a martha stewart punch and a die cutter from Cherry lynn -snowflake dies.
Oops Sorry I have just scrolled back in my blog and found I did a very similar looking card to this a month or so back ..lol even used some of same colour combos and papers.
Will try not to do something the same next time. Must have been a look I liked to do something so similar.. (think I should have passed theses off as a series than admit my mistake of doing two cards very similar .. you wouldn't have known ..lol)
 Thank you for visiting my blog.
Please feel free to leave comment or ask questions about the cards I make. All comments are truly appreciated.
bYe ByE
for now
Klare
:O)
x
 
Related Posts Plugin for WordPress, Blogger...