Monday, 18 June 2012

Spring swing- Lili of the valley (Photo wallet / gift wallet)

Hello again, Sorry I didn't get this post up at the weekend as I had intended. But its better late than never.
So now for something a little different to my usual posts.
This is something to for you to make your self's
this is what we are making.


Its a either a little photo  wallet or its just the right size to add the gift cards (credit card size)
So lets get started.

You will need a sheet of 12x12 paper cut down to 10½ inches by 10½ . I chose one that had a design on both sides as when its all folded you will see both sides of the paper.
Then I folded this down the middle
(image above)
After you have folded this down the middle then open it out and take each side and fold again towards the centre fold
 BUT  DON'T FOLD EXACTLY TO THE CENTRE LINE
 leave 1 to 2 mm off the centre line. for both side flap folds.
(See picture below)
Now open your paper out and it should look like this.

Right next we need to add some more folds
So all I have done here is taken each corner and folded it over till it meets the line we folded before.
If your paper looks like this we are doing well.
next bit
All I have done now is left corners we have just folded, and folded the two side in to the centre fold.
Now what you need to do is flip it over
as we are going to make some folds on this side now.
So now we want to fold the top section down
(see picture below)
How far down do you fold it I hear you shout.
Just till you see the start of the straight middle fold we have.
(See below image)
Now for the more difficult bit.
So  your top section is folded like above image right.
Now you want to bring up the bottom section up
and tuck the top section in to the bottom section
It will slide in  make sure you push it all the way in till it wont go any further.
don't crease it till its fully tucked in.
Once that its pushed in fully you can press it down flat to create your crease
So this is what you should end up with.... if it don't look like this oppps
you have gone wrong somewhere.
So now you have your little photo gift wallet. It has room for a few photos and sentiments cards
Right now its ready to add your touches
So I added cards to fit in each side of the pockets
You could add sentiments to these cards or use them as photo mats.
For the front I added a stamp from Lili of the valley- Spring Swing  added some seam binding ribbon to make a closure for the little wallet
I coloured the stamped image with my usual
Copic markers and Polychromos Artists Pencils
Rabbit: W0, W1, W3,W5 Pencils used warm grey III 272
Warm Grey IV 272, Cold grey III 232
inside his ear and nose R000
bunny tail C0
ribbon on swing : B000, B00
Oak leaves: G99,G94,G85.
Swing seat and branch: pencils Bistre 179, walnut brown 177

So that's it for today's post ... phewww that was a long one with picture overload.
hope you liked today's post.

Thank you for visiting my blog. Please feel free to leave comment or ask questions about the cards I make. All comments are truly appreciated.
bYe ByE
for now
Klare
:O)
x


Saturday, 9 June 2012

Dainty Dancing card- Lili of the valley stamp

Morning,  Just had to ink up this stamp from Lili of the valley and share her with you. She's just so cute don't you agree.
So what did I use on this card... what didn't I used ..lol
the outer frame is Martha Stewart around the page punch
Design papers from my stash
I always seam to have some bit of ribbon on my cards
added some flat backed pears
there's a paper doily in there somewhere.
dies cuts used are spellbinders and magnolia doohickeys and memory box
also used some flowers from wild orchid crafts
The little cutie was coloured using copic markers and Polychromos Artists Pencils
Skin: E000, E00,E11,R20 , Light flesh 132 pencil
Shoes and Leotard: B000,B32 & Warm greys pencils V, II for shading.
Tights : R000
Hair: E40,E33,E35,YR31, walnut brown 177 Pencil
Ground and image outline shading: warm grey II- 271, warm grey V-274
I added a little extra this card. Its a sentiment that's hidden away behind the image
The inside of the card was finished to compliment the front of card using the same spellbinders die, added a sentiment printed off the computer and a few sick on pearls.

I would just like to say a very big thank you to all the people who visit my blog. I love to read your kind and thoughtful comments, I read every one of them and they make my day to think that you have taken the time out of your days to look at my blog and leave such kind and thoughtful words it inspires me to keep posting my creations and to know my work its appreciated.
Thank you!
Thank you for visiting my blog. Please feel free to leave comment or ask questions about the cards I make. All comments are truly appreciated.
bYe ByE
for now
Klare
:O)
x


Saturday, 2 June 2012

Riding my bike -Lilli of the valley stamp (Father's day pop up card)

Morning, Well that nice weather was short lived. Back to cold cloudy and wet ... (sigh) I love the sun makes me feel happy and alive. (pulls on a another jumper)
Right  now for this weeks card.
Its Fathers day coming up 17th June 2012. So I made my Dad a card. Little early i know as fathers day always falls on the 3rd Sunday in the month of June. But by me doing it early it give you all time to gather some inspiration  and idea's for your fathers day cards.
So I made a pop-u free standing card. I like to try different styles of cards.
Here is the link for a tutorial on how to make your own free standing pop-up.
As you can see from this photo. When closed the card is flat for mailing
So for my card I used this cute image from lili of the valley its called
Riding my bike. This was stamped with memento ink then coloured with copic markers and I used a few of my polychromo pencils to add highlights and shading.
I distressed the outer edges of the image with distress ink - vintage photo. I also used this to do the sentiments. The round one is also from lilli of the valley. The ticket one is from Kanban crafts.
Its a great set as you get 6 different plain ticket stamps and then you get 12 different sentiment words you can ass to make your own ticket . You also get 4 little images to add to your ticket if you want.
Words in set are : ADMIT, ONE, TWO, COUPLE, SPECIAL, EDITION, DELIVERY, With Love,
HAPPY , BIRTHDAY, NO:2012. LIMITED
Images : a row of 5 stars, heart and crown and larger single star.
I embellished the base of the card with ribbon, buttons threaded on some  thick cotton, and some die cut banners.
I also added a pocket watch stamp with distress ink. The stamp  was free on craft stamper magazine
a while back.

Thank you for visiting my blog. Please feel free to leave comment or ask questions about the cards I make. All comments are truly appreciated.
bYe ByE
for now
Klare
:O)
x

Friday, 25 May 2012

Lili of the valley - together forever (engagment card)

WELL SUMMERS FINALLY HERE .....But for how long. Hope you are all enjoying
feeling the sun on your face.
So for this weeks card I've done an engagement card.
this card took me forever to make. But it turned out OK in the end..I think.
The stamp used is lili of the valley's- together forever  I thought would be a good stamp to used for my friends engagement. Wow what a rock she's got sitting on here finger. Not only did he impress her with this huge bling, But he choose the diamond him self and designed the ring and had it specially made for her. shes one lucky gal.
Sorry back to card...image was coloured using copic markers
I did make a list of colours used but its lost in sea of  paper/ card off cuts and a spilt pot of silver glitter on my desk. If said list is found I will update this post.
Question for you.... Do you want to know what colours I use ?
I know I do like to see it on blogs I visit just because if i am an stuck on a hair colour I want to create  some times I look on blogs to see what copics they have used to achieve theirs.
The shadowing was done using Polychromos Artists Pencils.
I used distress inks on edge pumice stone.
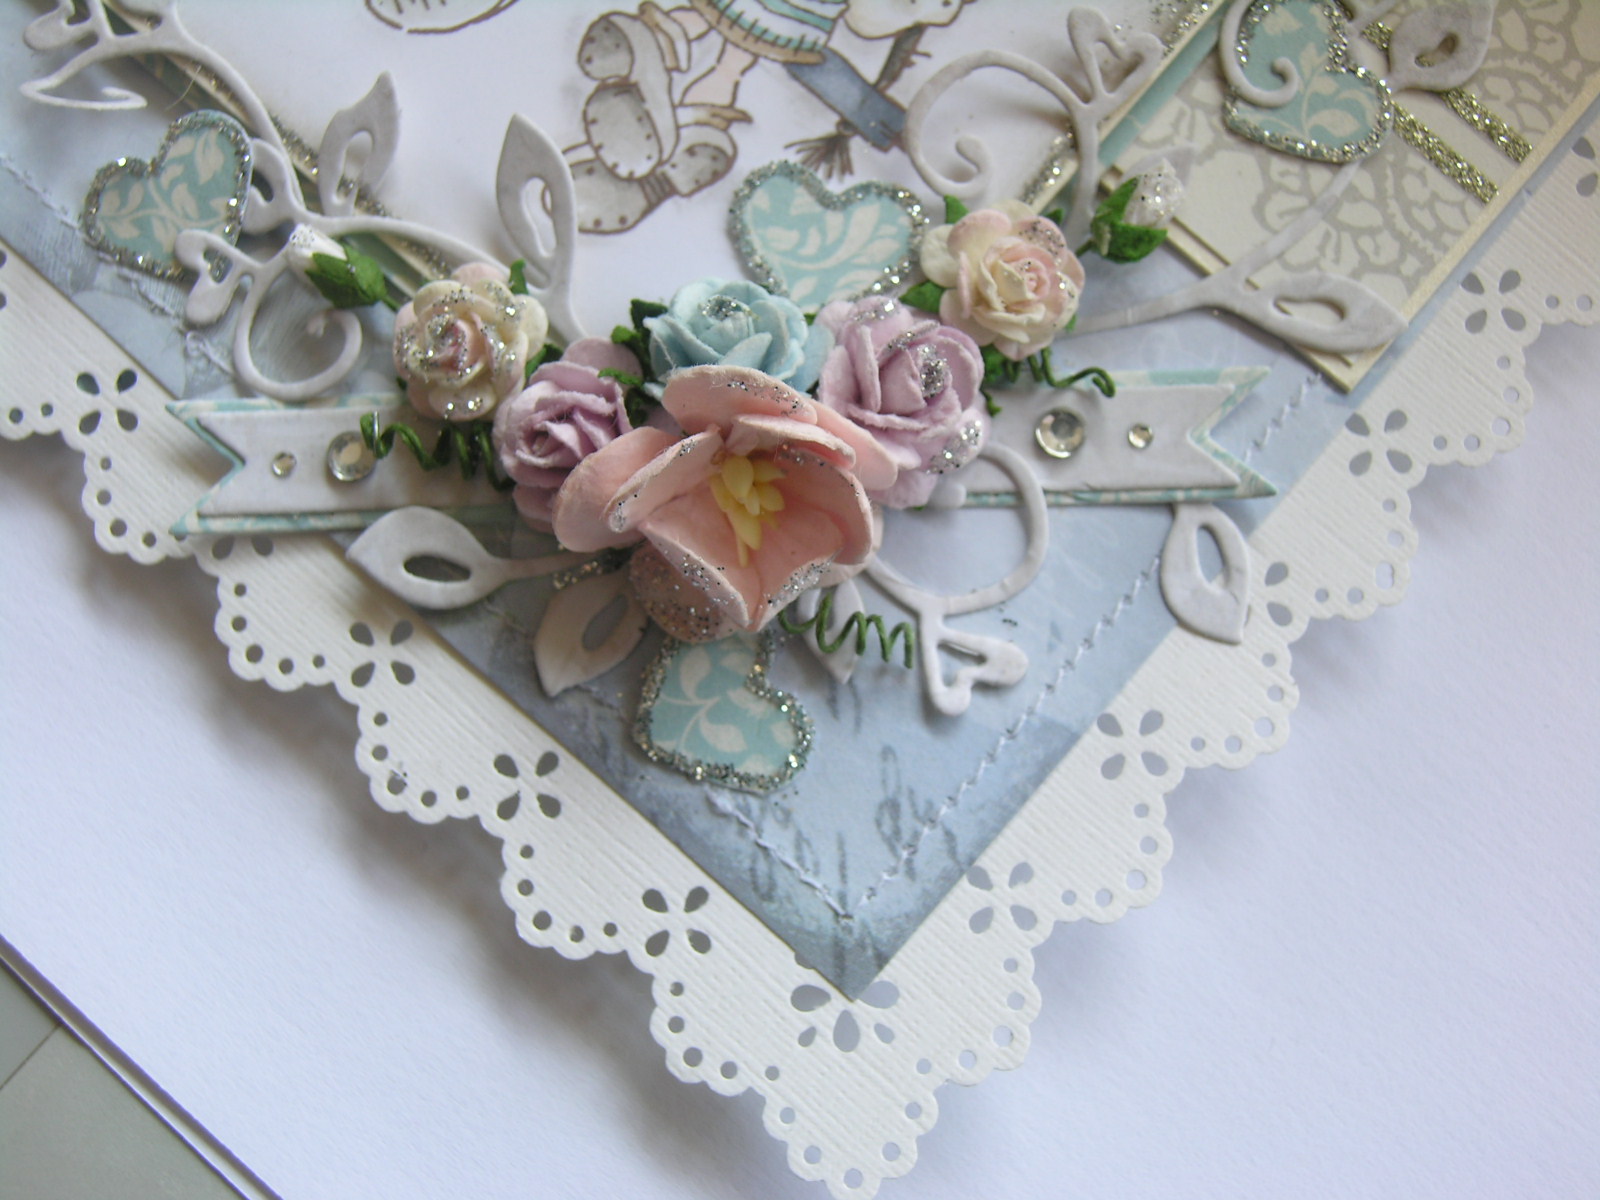
To bottom corner you can see I added a flowers from wild orchid crafts
I used  cherry blossom and roses in 2 different sizes then added the rose buds.
I cut off the stems so i could glue the flowers in to place . Some of the steams I removed and curled to make tendrils which I added the to the arrangement. I added the silver glitter to the flowers.
I also added a few of the magnolia heart swirl die cuts to the arrangement. Punched out a few small hearts , used glue pen to outline and added the micro fine glitter.
For outer frame I have used a Mather Stewart  around the page punch.
The inside I just made plain and simple.
used the around the page punch again added ribbon the same as the front of the card. and a couple of the punched glittered heats again.
Added a few finishing touches to front of card. eg sentiment, bow, punched hearts, flat back crystals, butterfly memory box die cut. think that's about it.

Thank you for visiting my blog. Please feel free to leave comment or ask questions about the cards I make. All comments are truly appreciated.
bYe ByE
for now
Klare
:O)
x


Friday, 18 May 2012

Penny Black stamp Gift Tag

Hello, Sorry I have been a bad blogger of late and not posted anything for little while. But you know how it is life gets in the way of what you would rather be doing at times.
Today post is only a little project but may help to get your creative side flowing. and this little idea is a lovely way to give a gift or take along to  BBQ as a hostesses gift  (lol I know been a bit silly. weathers not ready yet for BBQ'S).
So LETS GET STARTED
Take one of theses
6
a nice bottle of fizz
then
6
Take some transparent cellophane wrap this one had some flourishes printed on to it.
You can get this cello wrap at a florists or some greeting card shops sell it. Or try EBay
so what I did was take about 1 meter length gather it up around the bottle neck and secured with a ribbon tied in a bow.
I then made this gift tag to go on to the bottle.
I used a Penny Black stamp . I had this years but have not used them for a while. ( Note to myself look through and use some of my older stamps more often)
The image was stamped and coloured with copic markers and polychrome pencils. and didn't have a gold pen to do the edge of the bath ... but did have a gold stamping ink so I used a paint brush and smudged it where I wanted it. I used Xcut die for the frame and magnolia die for the pink vine type flourish.  The bubbles in cats bath tub were done using pearl decor pen to make them 3d. I let them dry and added more pearl bubble blobs to give more dimension.
To the top of the bottle where cello is gathered. I added some pearl sprays and attached some die cut butterflies. This is a memory box die.
Here is the finished item.
What i have done before is add wrapped chocolate's  loosely scatted inside the cello wrap then tied securely at the neck ( mmmmm Lindor Chocs my fave )
As you can see i also added a few bows there at the neck of the bottle.
I am sure who ever you give it to will be delighted with the effort you have gone too not only with there bottle of bubbly but how lovely it was gift wrapped.

I hope to get my self sorted and get back in to my  crafty room.
I did make a card to go on to my blog but....
it was not coming together right so that when in to bin..  opps.

Thank you for visiting my blog. Please feel free to leave comment or ask questions about the cards I make. All comments are truly appreciated.

bYe ByE
for now
Klare
:O)
x


Wednesday, 2 May 2012

Lili of the Valley - Rosie with cake for Lisa's b-day

Hello, You ready for this weeks card.Well one of the girls at the stables its her Birthday on Friday so I used this Lili of the valley stamp its called Rosie with cake, To make her a card.
Rosie's hair looks very much like Lisa's ..lol
That's why I choose this cute little stamp.
I coloured her with copic markers and polychrome colouring pencils.
Added stickles glitter to cake base, and used a glue pen and micro fine glitter on skirt, shoes and headband. Added so chunky cosmic glitter shards to hem of her skirt.
I used me pearl pen to add dots of texture to background. and stamped swirls to edges. Stitched a boarder around image. The arrangement to side is a fluffy feather with pearl spray added and used parts of memory box die, Serafina Heart, added a rose from wild orchid crafts and a little sentiment.
The inside of the card was decorated to compliment the front of the card.using the same papers I had put on front.
Because the cards a tad bulky to go into envelope. I make this little box to give her it in.

Thank you for visiting my blog. Please feel free to leave comment or ask questions about the cards I make. All comments are truly appreciated.
bYe ByE
for now
Klare
:O)
x


Tuesday, 24 April 2012

Hot Diggity Dog - Chocolates and Mouse

Shhhhh ... don't tell any one but the sun has been shinning here all day ... not a rain cloud in sight... well not  from the view from my craft room window.
Finally got round to making this weeks card today...
I used the cute little mouse sat nibbling on chocolates.
I  used my usual items for colouring copic markers and polychrome colouring pencils
To the chocolate's I added glossy accents
It doesn't show very well but I tried to add extra 3d effect  by choosing parts of the chocolates and adding glossy/a  then let it dry ... then added the next section of glossy/a . So some areas of the choccies were more raised than others.
 You can just make this out on the top of the choccie with red bits.
Here I made 2 bows,  added one on top of the other ... glued a small rose on top and added a cute little  'made with love charm'.
To the bottom corner I added ribbon. Also so more beautiful little flowers.
Made a little envelope  used spellbinders  die to cut out the little greeting card. 
Inked edges and stamped sentiment.

For the inside just added papers I used on front  and a bit of same lace used.
Used a Martha Stewart punch to create the square to write your sentiment's on.

 Off to stables now to enjoy the last few rays of sunshine of the day.
Thank you for visiting my blog. Please feel free to leave comment or ask questions about the cards I make. All comments are truly appreciated.
bYe ByE
for now
Klare
:O)
x

Related Posts Plugin for WordPress, Blogger...